Wednesday, June 21, 2006

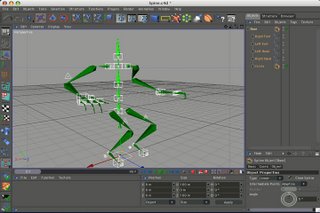
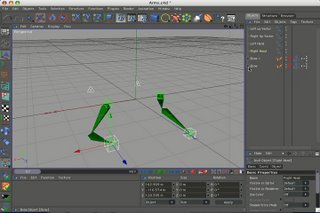
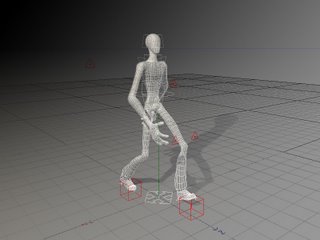
Walk Cycle Sample. Not the greatest walk cycle but it will familiarize most folks with what a standard walk cycle should look like.

Notable aspects of the sample are the linear interpolation of the feet during contact with the floor. Also the delayed action of the torso. Defined heel strike / foot pass keyframes.

Monday, June 12, 2006


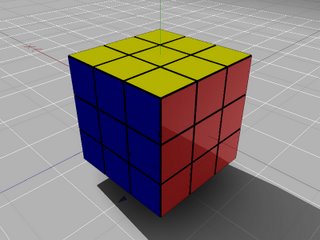
A little Rubik Fun. First the standard Rubik's Cube. The way to animate a Rubik's cube is by creating the necessary cubes in place and then aligning their axis so that they all share the same rotation point. Then by multi selecting a group of cubes that comprise a face you then rotate the group and keyframe it. Make sure you use Linear interpolation on the timeline to make sure that they all rotate in unison. The scenefile has a track on it already so just hit play when you open it.


The next thing is the XPRESSO driven Rubik Snake. The Rubik Snake is controlled by a series of sliders that control the rotations of the 24 objects that comprise the Snake. Just select the main object and the sliders will appear under the User Data I kept the step of the rotations limited to 90 degree angles and only allowed for 270 degrees of rotation per object to avoid redundancy. Pretty useless experiments but fun.

Sunday, June 11, 2006


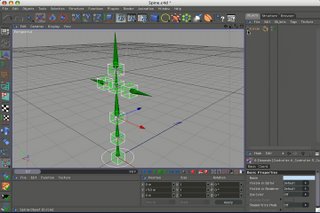
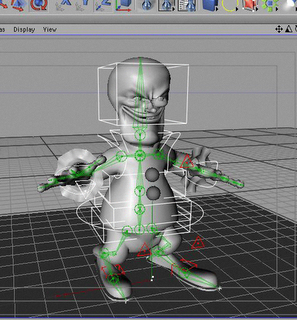
Here is the updated version of the PMan rig I posted a while back. Is a freebie rig that is fully articulated. The rig is the same one that I outlined in my earlier rigging tutorials. It is a fast rig that will give you realtime feedback in the editor. The Red triangles are the up vectors that control the orientation of the knees and elbows. There are sliders on the feet objects that control the various foot rolls. The sliders on the hand targets will control the position and rotation of the hands. also the slider on the hands will control the entire hand in a clenched position as well as unhide more detailed controls ( cubes that control each finger separately in this case). The spine is a simple FK (Forward Kinematics) rig. Select the cubes along the torso (including the head) and rotate them. This way you can have isolated control over the various sections of the spine without having to counter rotate any other part of the torso. The global control that controls the entire upper bodies rotation and position is the circle object at the waist. The rig is designed to be controlled by selecting the objects in the editor window and articulating controls in the Attribute Manager. Selecting any object in the object manager is actually not necessary to control the rig. The targets are either spline objects or Null objects. For the most unclutterred animating setup turn selections off for Bones, Null Bones, Hypernurbs and Polygons . Also hiding the Bones and Null Bones it will make the scene more uncluttered so you can more easily select the controls objects. I will post a few tutorials on how to animate a basic walk cycle soon. ( right click image for scenefile)

Sunday, June 04, 2006


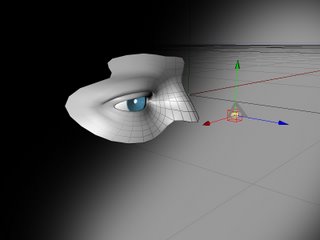
Awrighty Folks. Just when I thought all those old experiments I did were for naught. I find a usage for them. This is a rigged eyeball.

What it does is compensate for cornial deformation on the eyelid ( basically your lens has a bump on it and when you look around it moves your eyelid around).

This doesn't actually compensate for that bump but it simulates the eyelid moving around as it rests on top of the eye. The eye tracks the main target giving you standard eye targeting.

I used the old IK system in C4D to accomplish that. Pretty simple a null with an anchor tag. Place the eyeball objects in the anchored null, zero them out. then add a kinematic tag to the eyeball object. In this case I gave it a heading and pitch constraint of -22.5 to 22.5. banking of 0,0

I create a null bone at the exact place the eyeballs pivot point is.I give it an anchor and place another null bone inside of it. Name the one with the anchor "root" or "anchor" . name the one inside of it "Socket". Inside of the Socket null bone place another null and pull it forward by 20 inches. Place an IK tag on that .

Place a kinematic tag on the object named "socket". On the settings for the socket objects kinematic tag. give it a -22.5 to 22.5 on the pitch channel. leave the other ones at zero. Make sure they are checked off so they are enabled.

Create another null bone inside of the socket object. place a standard bone in the new null and rotate the null to -22.5. Copy and paste it and then rotate the new objects null to 22.5. Name them Upper eyelid/ Lower Eyelid respectively.

Place restriction tags onto the eyelid deformer bones.

I created 2 null objects for targets. One will control the eye and one will control the eyelid. I place the eyelid controller inside of the eyeball target. That way they both track in regular mode but if you wanted some cool looking eyelid moves you can override by simply moving the eyelid null inside of the main target. i tied some sliders to the main target with xpresso. On the Target object there is a slider that controls blinking.

The reason I used bones was to capture the sweeping movement of the eyeballs. with standard morphing you only get points moving in a linear fashion. This can be problematic because sometimes the eyelid goes through the actual eyeball object.

(Click on the image for the scenefile)
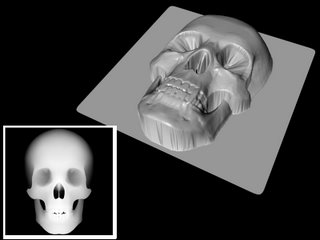
An experiment with deriving relief maps from 3d objects. I put a gradient map on an object in the luminance channel of its texture ( in this case a cool skull I found online). Making the closest part of the gradient white and the farthest part black ( actually I only put the gradient halfway through the skull). I used a black texture underneath it to keep things clean.

I then rendered it out from the front with no perspective distortion. The resultant map I applied to a standard parametric plane and then used SPD . The height setting I set at exactly half of the z scale of the skull itself. The skull I found online and was a freebie.

The 3.8mb archive attached has two scenes in it. One called ReliefGen.c4d and one called Relief.c4d. The ReliefGen.c4d scene is the base file with the skull and the gradients applied to it. the Relief image has the scene with the texture applied to an object. The texture derived from the first scene is in the tex folder of the Relief.c4d scene.

Saturday, June 03, 2006


A scene I cooked up after reading a tutorial on Maya. I wanted to see if i could translate it into c4d. The scene illustrates the usage of the history function of XPRESSO. In the scene I have a null object with a slider attached to it. The slider controls the first set of the bones and the XPRESSO node calculates the delayed motion of the successive bones. The slider already has an animation track on it so just hit play. ( Right Click the image to DL the scenefile).

Friday, June 02, 2006

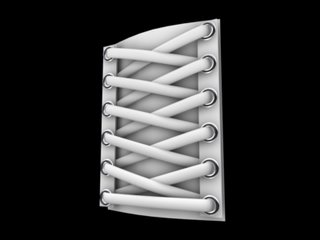
Nothing spectacular. I just was experimenting with ways to make (somewhat) believable shoe laces in 3d using lofts. ( Right Click image for file)


A Little scene I threw together that incorporates the rotate plane solver. I wanted to make a set of realistic hydraulic struts that would move with the arm accordingly. Making it look as if they drove the movement of the arm. (Right Click on the image to download the scene). the red cube in the scene is the target and the red triangle is the up vector target.

A DJ animation I animated for a client. The models were provided for me. Rigged and animated in C4D 9. Motion blur was added in After Effects 6.5

Thursday, June 01, 2006


Weighting. a quicky tutorial showing how to weight in realtime and get realtime feedback in the viewport. I use C4D's standard vertex selections for the weighting. Honestly I think that CB is still not mature and is not conducive to realtime playback within the editor. What i do here is create an objec to be deformed. Set a few bones in it. Drop them all into a hypernurbs object ( for you guys with slower computers you can turn the subdivisons down to zero in this case. the Hypernurb is only used in this case because hypernurbs create a sort of instance of your object and will show you the smoothing/weighting of your finished piece without and damage to the original mesh).

I apply restriction tags to the bones and put names in the selection fields. Then i create a vertex map ( in vertex paint mode) and then name the tag the same thing I named the bones. Now when i start painting weights ( I use set all that adding and subtracting can get confusing) you will see the influence of the bones deformation on the mesh. I moved the bones so that i will be able to see the deformation. if your bones and your mesh are in the same position you might not be able to see the deformations while you are painting the weights. I just set my bones function settings to 1/r^10. If you set the root bones setting at that function setting every bone along the chain after that will observe the same settings.

link to video:
http://www.traumatik.com/graphics/Rigging%20Tutorial/Weighting.mov

link to file:
http://www.traumatik.com/graphics/Rigging%20Tutorial/Weighting.c4d

7. Final Setup shows the hierarchical ( parent/child) grouping of all the rig pieces we created . It shows how they will relate to the control systems as well as parenting. This tutorial gets kinda hairy but if you just bear with it it will sink in. Is just simple parenting.

6. The Spine: This is what is called FK ( Forward Kinematics) . A lot of stop motion animators opt for an FK spine because it mimics what they do with stop motion puppetry. Basically you setup a rotator ( in this case a null bone) and a deformer. A standard bone that is usually rotated 90 degrees in a given direction. You then attach a controller object ( in this case a spline cage) and tell it to control the global rotation of the null bone. I use the same type of system for the shoulders ( FK).

You can then just copy and paste these little guys and parent them to get a realistic , simple and calculationally light spine system. The benefits to this setup are you can animate the progressive breaking of joints and also have concise global control over any section of the spine at any time.

I think that this setup coupled with a more procedural spine setup would make for a pretty formidable spine solution. Basically a procedural spine system can get unwieldy and can be no fun to animate. If you drop the controllers into the boxes you will have the simplicity of the FK control system I outlined with the procedural complexity of the detailed spine system. I have yet to try it but I know it will work.

5. Arms/Hands. This video shows the hierarchical grouping of the hands to the arms setup we created earlier.

4. Hands. Shows how to set up bones and add controllers to them through xpresso nodes. I set up a series of spline based objects for easier selection. The spline boxes have sliders attached to them so that when you want to control the various finger rolls you just select the boxes and then move the slider. They will update in realtime.

The real beauty to this is that if you want to make a fist with all of the fingers just select all the boxes of a given hand and then rotate them along the pitch axis. you can keyframe multiple items in c4d this way. I set up the tips of the fingers to be procedural. so that the last 2 digits will rotate together.

Mostly so that you can get special finger moves like if you wanted your character to hang by his finger tips you could do that. but also lessen the amount of controls needed to control all the bones of the hand. the thumb I dont setup this way anymore. I actually just set it up from the second bone from the root now. is just less problematic

3. Arms. In this video we set up a basic arm rig. It involves setting up a hierarchy of bones and then attaching ik tags to limit movements of the bones and also the usage of an up vector node in xpresso. Pretty much the same thing as the Rotate plane solver for the leg.

2. RFL: This shows the setup of the dreaded reverse foot lock. It is incorporated into the Rotate Plane solver tute. it sets up the various foot rolls that the are needed to animate the foot


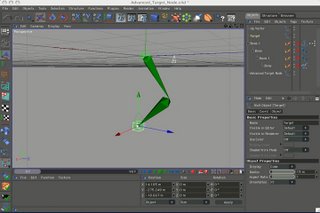
1.Rotate Plane Solver. Ah, the rotate plane solver. This little gem is pretty much the bread and butter of most pose based CG animation. In this tute we set up the hierarchy using C4D's legacy IK system and override its tags with an up vector node.. Basically the ik is used to animate a 2d system that is calculated till it hits the hip pivot. the pivot has an anchor on it that tells c4d when to stop calculating its ik function along a given length of limbs. The up vector node overrrides the anchor and enables a parent system that is calculated in 3d space. Basically it gives you a realistic knee bend and precise control over the orientation of the entire system.

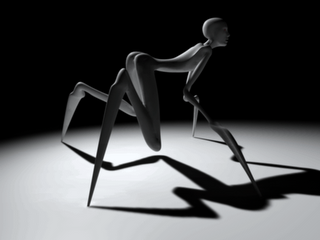
A Spider Chick I made for a private project. I had to figure out away to control limbs with 3 sections. At the time (roughly 2 years ago) there was no solution for doing so in Cinema 4D. I ended up making a workable 3 section limb based on my earlier rotate plane solver.

It wasn't the most elegant solution but it worked for what I needed it for.

Being a child of the 80's. I just had to build a version of the Noid from those Domino Pizza ads. I really wish they would bring him back.

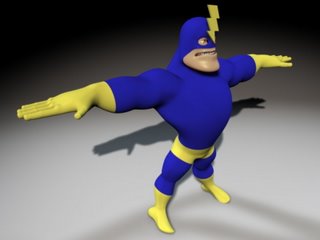
Another Rigging image. This time for the super hero guy. Pretty much the same setup as th eKlown. This one has a special banking solutio for its bones that allows th euser to simulate wrist rotations ( as strange as it sounds wrists are th ehardest things to do with standard rigging techniques). The cubes floating above his knuckles are the controls for his fingers. You select them and a slider will appear in what is called the attribute manager ( thats the pretty much the channel box for you Maya users).

Here is an image of the Killer Klown rig I set up ( A rig is the control system for any given character). In this image the green objects are the bones. They deform the mesh in a way that real bones do.

The various boxes and ellipses are objects that you use to control the rig. This rig is pretty much mine from the ground up. I used the old basic IK ( Inverse Kinematics) setup for C4D and used it with a few tweaks and plugins I found and had made for me. namely West's advanced Target Node.

This allows what is called a rotate plane solver ( I will explain it someday). The red triangles control the elbows and the knees orientation without moving the hands or the feet. That way you can control the elbows and knees and keep the hands or feet planted. The only thing this particular setup didn't have was a morph system.

More inspired 3d work. I set this guy up using a default character creator scene that can be used to make bipeds quickly and accurately. It involves lofted splines and stuff. I really should use that technique more.

He is fully rigged. I set up a way to simulate the way that motionbuilder does banking ( twisting in this case) rotations along bones.

Basically it gives you a nice organic looking deformation and lessens the effects of pinching ( mainly shoulders pinch because of the way they are laid out). The only thing is that the system I created is very touchy and can be no fun to animate with sometimes.

I have no idea what I am going to do with him. I just built him on a whim.

I built this Character in Cinema 4d v8.5. I really like evil looking clowns. This guy is obviously inspired by the "Killer Klownz from Outer Space" (filmed in santa Cruz before the 89 quake If you want to see what Santa Cruz looked like before it was destroyed by that quake this is a good reference film).

Since I have built this guy. Cinema 4D has cloth as well as that great translucency plugin I was talking about in my earlier post.

I had a unicycle built for him that had a pentagram shaped rim. I was gonna have him do a ll this mean and nasty stuff. Now that I am more confident with my animation chops I may just do a short with him. If I can find the time.

The image is not the highest quality. I have to re-rig and re-texture him since I lost my master in an HD crash. So please excuse the poor compression quality of the image.

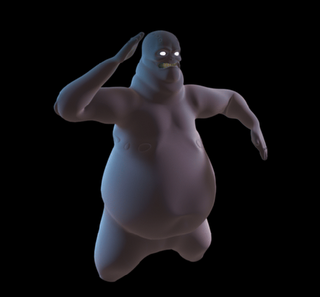
Here is the Model I built of the Chris Farley ghost. It is a fully rigged SDS model built in Cinema 4D. I am using a surface plugin created by a brilliant man named Arndt Von Keonigsmarck to simulate translucency. I may just animate him for the sheer heck of it. Or maybe use him on another project.

I think that I could add another level of detail with him using what are called SPD maps ( sub poly pixel displacement) Kinda a deformation map on steroids.

I used to really love the game Quake. So much that when i used to be a bike messenger I flinched once because a trolley hit a cable buckle and i thought it was a troll lobbing a grenade at me ( audible hallucinations, they say the brain is the first thing to go).

I really loved the dogs with the claws on each hand. I was feeling really inspired by them and I drew this guy up. the shoulders don't really match a quadrupeds makeup. it looks more like a bipeds shoulder.

I just like mean looking critters I guess.

I once had a wild hair about making fan films. I wrote a treatment for a short Ghostbusters fan film. I had locations and even a few actors to play in it for me. Alas someone beat me to it. I still may do something with it.

Most people dont know that Slimer is actually supposed to be the ghost of Jon Belushi. I f you look at the film Slimer pigs out on hot dogs much like how Jon Belushi did in the film Animal House. It was sort of an inside joke for the crew.

Chris Farley lived his life in a very similar copycat manner. he used to joke about how he wanted to die just like Jon Belushi and there are a few very similar aspects to both of their demise.

So in my short film I made the ghost based on Chris Farley. Sort of an inside inside joke. That Chris Farley not only copycatted Belushi in life and death but in the after life as well.

This little guy I drew up when i was just kicking it around the house.

I did him as a sort of test to try out a photoshop coloring technique. Something about this drawing just makes me feel better when i look at it. maybe cause he is so cute.

Back in 1994 I did a little character concept design for a line of Dark Horse Comics .It was for a Godzilla book. If can find the illustrations for the character concept ( cyber Godzilla) I will post em.

This little guy I drew and tried to see if they wanted to use it for the letters to the editor pages. It was not used . So recently I touched it up and slapped a little Photoshop color on it.